
If your site seems slower than ever before or you get random errors from a plugin while developing your site, you’re probably running the wrong version of PHP. Whether you’re running WordPress, Laravel, Joomla, or anything else, PHP is the foundation of most websites you’ll find online, and not having it updated for a long period of time isn’t a good idea. It exposes you to security vulnerabilities, slows down your site and eventually conflicts with the newer plugins and themes.
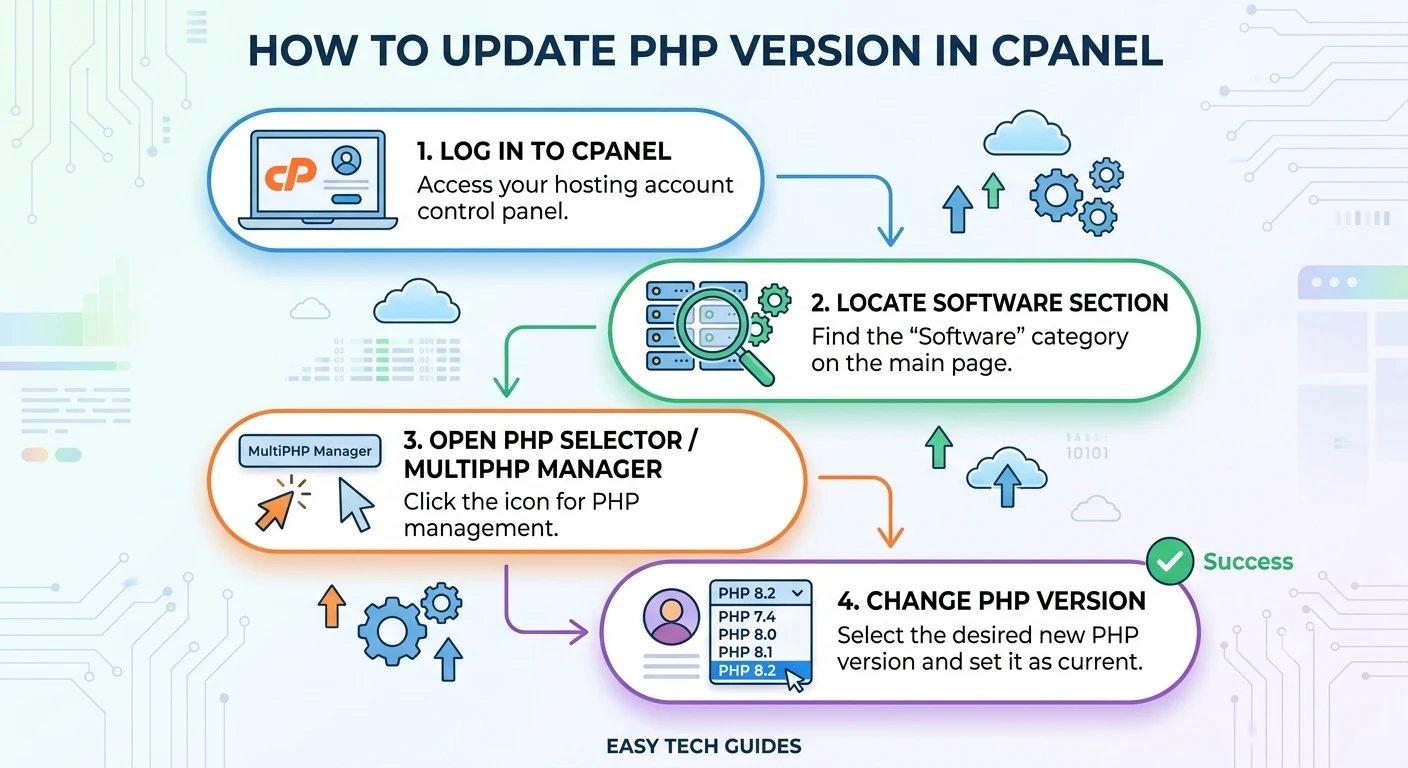
Fortunately, cPanel makes it relatively easy. You will be able to use one of a few different tools depending on your host: Select PHP Version, MultiPHP Manager, or the CloudLinux PHP Selector — any of these will take a few minutes to complete.
Why Even Bother with Updating PHP?
Each new version of PHP tends to come with a few things – better performance, and any security holes that have been patched. The PHP maintainers are continually patching vulnerabilities in PHP because older versions aren’t supported. Not only is “newer is better,” there is a real security argument here.
For WordPress users, it’s a good idea to find out the PHP version that your theme and plugins require before making any changes. Upgrading two or three significant versions at a time might cause things that have not been updated for a while to break.
Determine the Version You’re Running
You should find out what you are running before making any changes. This can be accomplished either via your cPanel dashboard if you have it installed or by uploading a quick phpinfo() file and opening it in a browser. It is okay to use either of these.
Make Sure You Back up First
This is the step that people miss and then come to regret. Before changing to your PHP version, backup:
- Including all your website files.
- Your databases
- Configuration of email (if it is hosted there).
- Any custom application setting.
If something goes wrong after the update, a backup is a minute away from being back online, rather than hours.
Choose PHP Version
The first step is to choose the PHP Version.
- Log into cPanel.
- Look for “Select PHP Version” (typically in the Software folder.
- Select the version you wish to use.
- Click “Set as Current.
- Save.
It’s all yours, your site goes live instantly.
MultiPHP Manager
- Open cPanel.
- Go to MultiPHP Manager.
- Choose the domain that you desire to modify.
- Choose the PHP version.
- Click Apply.
The great thing about this tool is that you can have multiple PHP versions for multiple domains on the same account, which is useful if you have one domain that needs an older PHP version and another that doesn’t.
Alternatively, You Can Install a Single PHP Version
CloudLinux PHP Selector
You may find the following feature if your host is using CloudLinux. It allows you to change versions, enable/disable extensions and adjust some of the PHP configurations without accessing the server, for example. It’s pretty popular on shared hosting, because of that.
Check Your Settings
After changing versions, check to see if your PHP settings have been updated. Some features such as max upload size, max execution time, error reporting and memory limit can change or reset from one version to another. Most hosts provide a MultiPHP INI Editor, which will enable you to change these without making any modifications to any configuration files.
Don’t Forget Extensions
Certain applications require special PHP extensions to operate and these are not necessarily automatically transferred to the new PHP version. Some of the common ones to look for:
- mysqli
- curl
- mbstring
- gd
- zip
- intl
Only activate what you need – unnecessary overhead otherwise.
Test Everything
Don’t simply patch it and then move on. Make sure that your theme and plugins are still correct, load your site, click through some of the main pages and test any forms. When something is broken, it’s almost always a plugin or theme which hasn’t been updated for the new PHP version.
A Word about PHP Handlers
Some hosts even allow you to choose a PHP handler as well. If you don’t know why you would want to change it, just leave it on the default as it is rarely something to adjust.
When You Actually Benefit from An Update?
On the Performance Side
Quick page loads, reduced CPU usage and enhanced overall database handling. The newer versions of PHP are significantly faster than were a couple of years ago.
On the Security Front
You receive regular patches, rather than a version which has reached end-of-life and which no longer receives patches at all. The second part is more important than you think if PHP isn’t supported, then it’s an invitation for trouble.
If something breaks
The majority of issues following PHP updates can be categorized into a few regular buckets:
- A plugin with outdated compatibility code.
- A plugin that has not been maintained for years.
- An old theme with out-of-date functions.
- A missing extension.
- A setting that was not saved in a config file.
Of these, none tend to be difficult to correct — it is just a matter of finding which plugin or theme is causing the issue, and updating or replacing the plugin or theme.
A few good habits
- Always back up prior to PHP versions.
- Use versions that are officially supported by your host.
- Test your site immediately after updating – not days after!
- Be sure to keep plugins and themes up to date, otherwise they’ll fall behind PHP.
- Don’t assume that things are fine forever, check in on performance occasionally.
Wrapping up
When updating PHP in cPanel, it is not complicated at all if you know where to look to do so, such as Select PHP Version, MultiPHP Manager or CloudLinux’s selector, it is a process that typically only takes a few minutes. Back up first, test settings and extensions second, and then check your site for anything amiss. That way, you’ll have a quicker, safer website with hardly any hassle.